(work in progress…)
Core technologies:
- Lenticular Lenses (my focus)
- Parallax Barriers
- Directional Backlights

Browse posts by year. Within each year, entries are ordered by last modification date (newest first when available).
(work in progress…)
Core technologies:
(work in progress…)
(work in progress…)
Due to the faster computation, C++ is still (2026) the best choice for real-time rendering and Python is far behind in this real-time performance race. C++ is a powerful language with different excellent features, some are the latest version-dependent as well. Nonetheless, over the years, I have noticed, some of the commonly used C++ features used in graphics rendering are, Pointer and References (the smart pointer might be helpful to reduce data leak), STL, Type Casting, Vecot and Matrix Operations, etc. These are some of the frequently used features.
Someone working (or interested working in Graphics Rendering) may already have profound knowledge of the language. Besides, I might recommend some of the excellent learning resources, viz. Learncpp, CPP Reference, MS C++ documentation, MS C++ Blog, CppCoreGuidelines, cpp different versions’ features cheatsheets, isocpp, cppcon, helped me understanding the language. However, learning by actually coding is the best way in my opinion. There are several git projects for C++, e.g., Bjarne Stroustrup’s Github repository, 30-seconds-of-cpp, cppbestpractices, project-based-learning.
Naming convention for a C++ project may vary company to company, even among different developers’ team. The google C++ style guide is a popular choice. Besides, someone can check C++ Best Practice, similar to Boost Style and C++ Coding standard. The Hungarian Notation was once a popular choice as well.
Documentation is essential for understanding the gist of the code in the quickest possible time. Unfortunately, in my experience, this is the part where the development team often pay the least attention. Doxygen is being used for long time for documentation purposes.
A robust package manager system is important for developers to maintain the standard and open-source libraries, especially to maintain the appropriate version. Unlike Linux, Microsoft OS does not have a central package management system. However, VCPKG does the job, and suitable with CMake. It is cross platform. Other than VCPKG, there are some other package manager, e.g., Conan, Hunter also popular.
The success of graphics rendering remains in efficiently debug and profiling, both CPU and GPU side. Other than someone using the Visual Studio, or Visual Studio Code, or any other IDE, there are a bunch of online compilers, e.g., Compiler Explorer, online gdb, C++ Shell, wandbox, Coliru useful sometime. For online benchmark, you can check quick-bench, perfbench, buildbench, CPP Insights- what compiler sees. Moreover, these off-line tools code analyzer: lizard 1.17.9-lizard 1.17.9, coverage code: Gcov is a source code coverage analysis and statement-by-statement profiling tool are also handy. Besides, for the GPU side profiling there is a whole bunch of tools, e.g., PIX, NVidia Nsights, etc (will write an in-depth article on this topic in future)
Probably, Rust (👍🏽), Lua, Nim, Zig, C3, Golang/Go, Dart, Carbon could be name as the Successors of C++ language.
(work in progress…)
Unlike Linux, the Microsoft Operating System (OS) does not have a central library controller. The vcpkg can partially do the job, but sometimes with a bit extra tuning. Besides, there are several package manager exists. One popular alternative option is the Conan. However, here are some instructions on vcpkg, could be helpful for the beginners.
vcpkg has two operation modes: classic and manifest. During the classic mode, installs packages globally in a shared installed directory (e.g., C:\vcpkg\installed\x64-windows), managed by explicit vcpkg install commands, like traditional system package managers (apt, brew) but local to the vcpkg root, while manifest mode uses a project-specific vcpkg.json file for declarative dependency management, installing packages into a project-local vcpkg_installed folder, offering better version control and project isolation. Moreover, the manifest mode is often recommended for most of the new projects due to its explicit dependency declaration and easier reproducibility, whereas classic mode suits simpler, shared library setup.
C:/ drive). Therefore, for github cd C:\
git clone --recursive https://github.com/microsoft/vcpkg.git
Environment Variables >> System Variables >> path >> new >> (add) C:\vcpkg However, I found no visible effect whether set it or not..\bootstrap-vcpkg.bat.\vcpkg integrate install (!important: this will integrate with current visual studio)CMake projects should use: "-DCMAKE_TOOLCHAIN_FILE=C:/vcpkg/scripts/buildsystems/vcpkg.cmake".\vcpkg.exe search library_name (e.g., opencv).\vcpkg.exe install library_name:x64-windows (:x64-windows for x64 machine, otherwise x86 is default). This might take a while!.C:\vcpkg\installed, also under packages folder.Also, .\vcpkg.exe list will return all installed libraries
.\vcpkg.exe integrate install to integrate with visual studio.integrate is important if someone want to access files easily under C:\vcpkg\installed\x64-windows\include directory.\vcpkg.exe remove package_name:x64-windows--recurse command if other packages are depend on that packages, e.g., .\vcpkg.exe --recurse remove python3:x64-windows.\vcpkg.exe remove *:x64-windows.\vcpkg.exe integrate -> vcpkg is deleted. To remove vcpkg integrate remove need to call.Some packages like boost, and qt5 are “meta-packages”. This means that these packages themselves are empty, and what they do is depend on other packages to install them all together as a convenience (not clear).
debug machine it is x86/x64#include<start_the_library_name>, the library will appear.\vcpkg.exe integrate project in the power shell and follow the instruction. Generally the instruction is:Tools->NuGet Package Manager->Package Manager Console and paste: Install-Package vcpkg.C.vcpkg -Source "C:\vcpkg\scripts\buildsystems"-DCMAKE_TOOLCHAIN_FILE=C:/vcpkg/scripts/buildsystems/vcpkg.cmake? cmake_minimum_required (VERSION x.x)
set(CMAKE_TOOLCHAIN_FILE "C:/vcpkg/scripts/buildsystems/vcpkg.cmake")
project (project_name)
file (GLOB_REUSE fileCollection "Source/*.h"
"Source/*.cpp"
)
find_package(assimp CONFIG REQUIRED)
add_executable (project_name ${fileCollection})
#find_package can also be here
target_link_libraries(project_name PRIVATE assimp::assimp)
cmd -> type "diskpart"
list disk
select disk <number>
clean
create partition primary
format fs=ntfs quick // format fs=fat32 quick
//optional step
assign letter=h //any letter you want to
exit
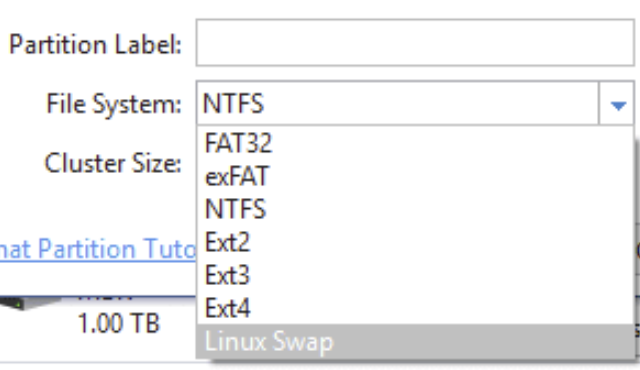
run>> msinfo32>> BIOS ModeUEFI then partition scheme GPTBIOS/ CSM/Lagacy then partition scheme MBR 👍🏼 selecting MBR is betterAdministratorrufus don’t see the .iso file, copy the .iso to C: drive in a folder, e.g., isosomething elseEnter for boot menu -> disable secure bootingFn before pressing F12del/esc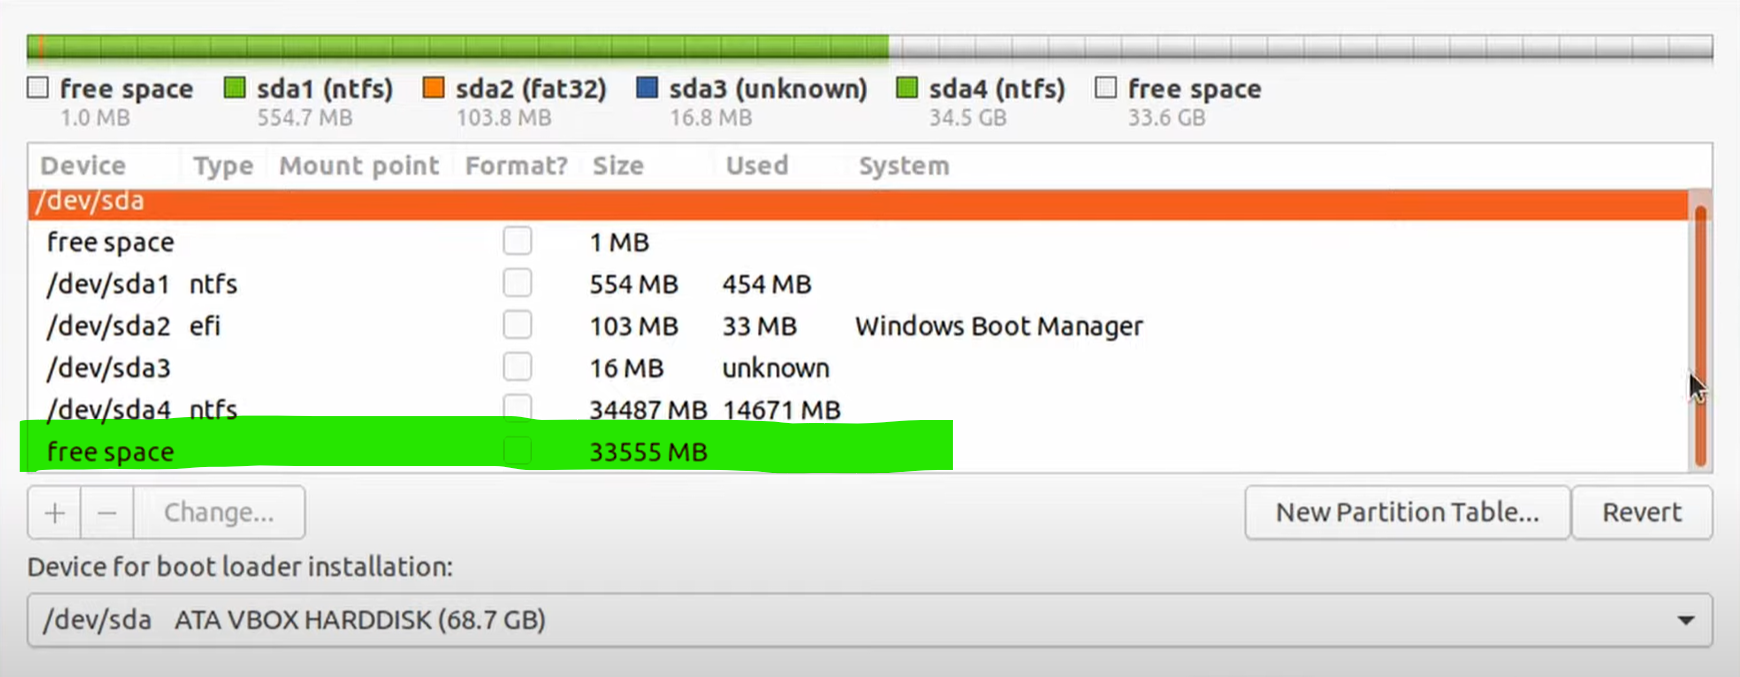
free space, select file systems Ext4 and mount point: \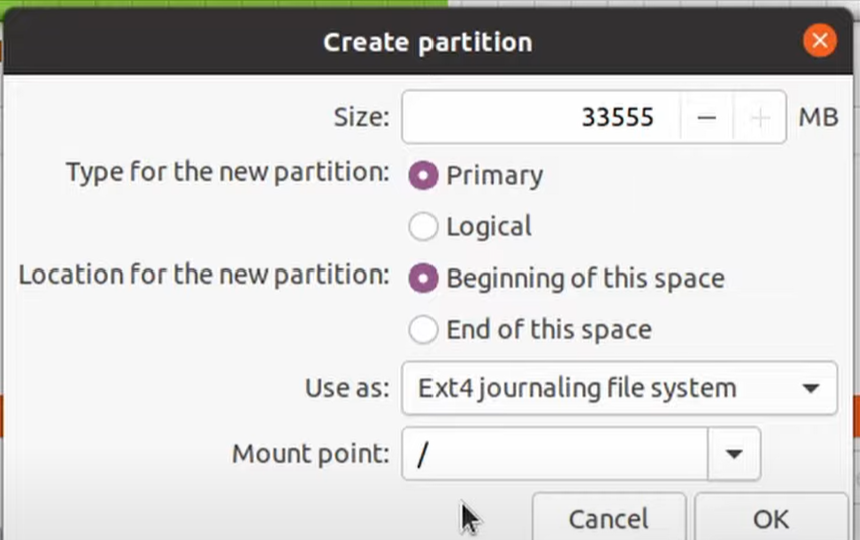
most important: In dual boot mode, select the Device for boot loader installation: /dev/sda2 Windows Boot Manager 
If needed, follow this video if necessary
Overleaf Worshop from Visual Studio Code Extension, more on the Overleaf Workshop githubset-cookie (copy it)Overleaf Workshop » Login to Server » Login with Cookies » Paste the CookieWrite Assist AIhttps://platform.openai.com/api-keys and generate a new secret keyand copy itCtrl + Shift+ P to open the Command PaletteWrite Assist AI: Set OpenAI API KeyHTML, CSS, Javascript, or any other languages if like.sample-git, then your page name must be sample-git.github.io, which later will generate url https://sample-git.github.iopush files to your repository, upload templates, or develop manually.https://search.google.com/search-console/welcome?hl=en&utm_source=wmx&utm_medium=deprecation-pane&utm_content=homegoogle_verification.html code
No posts match your search.